CardCobra Documentation
Step 1: Kronocard Setup
If you don't already have it, you will need to purchase an AI package from Kronocard as well as the Export add-on. Their support team can help you if you have any issues or, if they can't help fast enough, you can reach out to me (Paul) or Chaz for assistance on Discord or email [email protected]. Almost all CardCobra users already have experience with Kronocard so I will come back to this section and add more details in the future.
Step 2: Launch CardCobra
When you launch CardCobra, you'll see the prompt below. Just enter the email that you signed up with and then click on the settings tab to begin configuring your settings. Enter your email into the email field too. Next we'll setup AWS and add in those settings, then we'll go through all the rest of the settings in order.


Step 3: AWS Setup
AWS is required in order to host your images. They have a generous free tier and once you exceed that it is still very inexpensive (as of this writing, I have used AWS for about a year and a half and my statement last month was for $0.24). Create an account here: https://aws.amazon.com/
Once you're in, create a bucket first. Go to the top search bar and type in "s3" then click on "Bucket" to navigate to the correct page. Then click on "Create Bucket".


Next, type in a name for your bucket. This bucket name will be entered into your CardCobra settings as shown in the screenshots below. You will also have to unblock public access and click the confirmation box that appears when you do so. This allows the images to be displayed when someone goes to their URL which is exactly what we need for eBay to show your images in the listings.


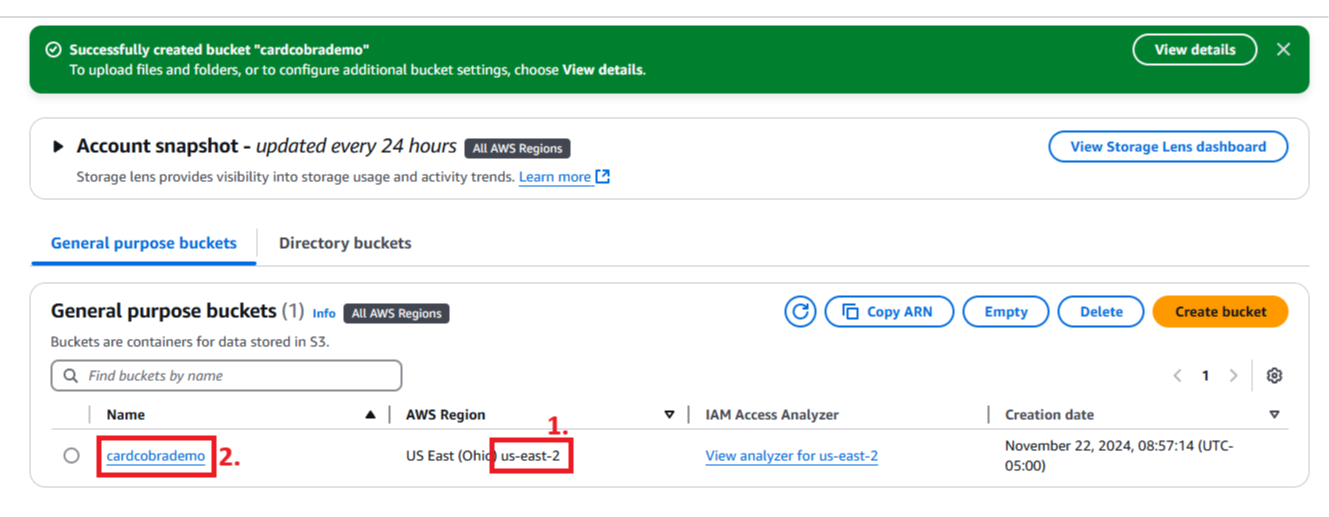
Now we can see the bucket's region (labeled "1." in the first screenshot) and copy/paste that into the CardCobra settings. Once that's done, click on the bucket's name (labeled "2." in that same screenshot). From there, click on "Permissions" and then find the "Bucket Policy" section and click on "edit".


You'll now need to copy/paste the following json to the policy and replace the bolded "bucketname" with your bucket name. Make sure all of the brackets are also included. In the screenshot, you'll see that I used the example bucket name that was created which is "cardcobrademo".
{
"Version": "2012-10-17",
"Statement": [
{
"Effect": "Allow",
"Principal": "*",
"Action": "s3:GetObject",
"Resource": "arn:aws:s3:::bucketname/*"
}
]
}

Now we'll create a user that is able to upload the images. In the top search bar, type in "IAM" and click on "Users". The click on "Create User". Enter a user name and click on "Next". Select "Attach policies directly" (labeled "1." in the screenshot) and then click on "Create policy" (labeled "2." in the screenshot). Create policy should open up a new tab in your browser, which is where we will then add a new policy. Keep the original tab open because we will come back to it.


On the "Create policy" page, click on the "JSON" toggle (labeled "1." in the screenshot). Then you will need to copy/paste the json code below and replace the bold "username" with the user name that you just created previously and replace the bold "bucketname" with the name you used to create your bucket earlier. Make sure to include all of the brackets when copying and pasting. When this is done, click "Next" and name your policy "cardcobra". Then click on "Create policy" and return to the tab where you were creating your user.
{
"Version": "2012-10-17",
"Statement": [
{
"Sid": "username",
"Effect": "Allow",
"Action": "s3:*",
"Resource": "arn:aws:s3:::bucketname/*"
}
]
}


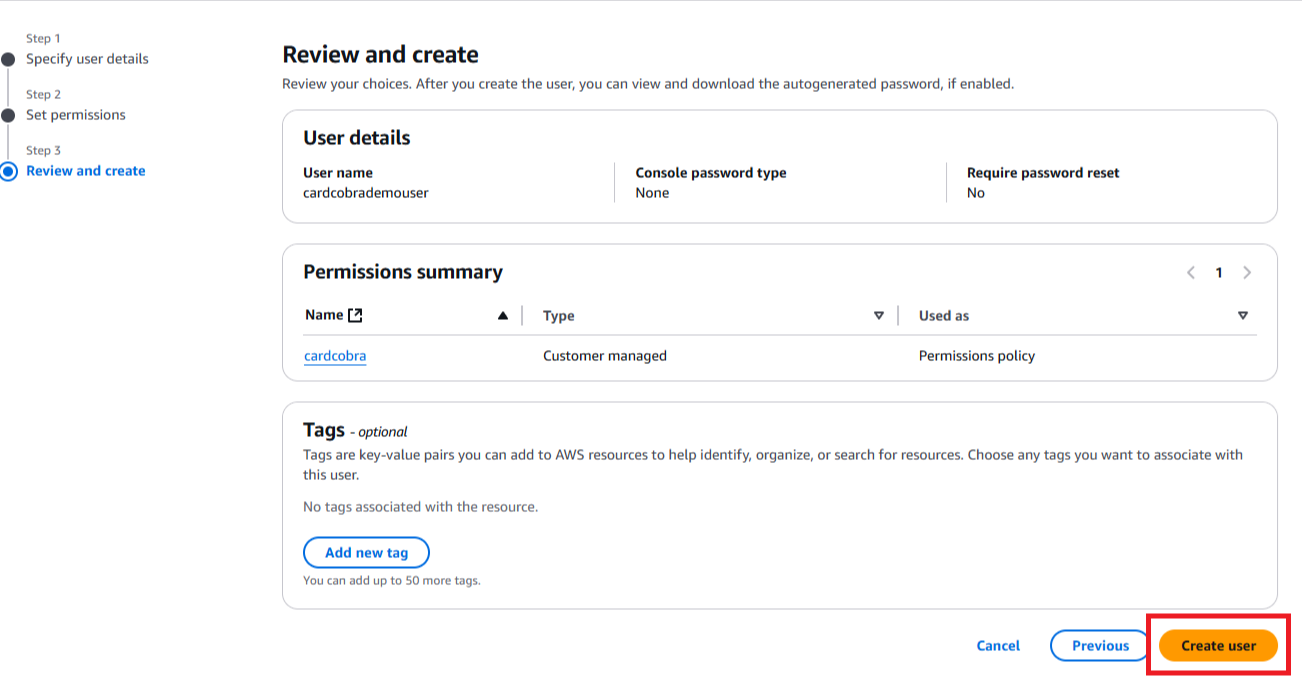
On the tab where you were creating your user, you will now click on the refresh circle (labeled '1.') to allow us to find the "cardcobra" policy that we just created. In the search box (labeled '2.'), start typing "cardcobra" to make the policy show up. When you see the cardcobra policy, check the box next to it (labeled '3.') and then click next (labeled '4.' because I was really on a roll there in MSPaint). On the next page, click on "Create User".


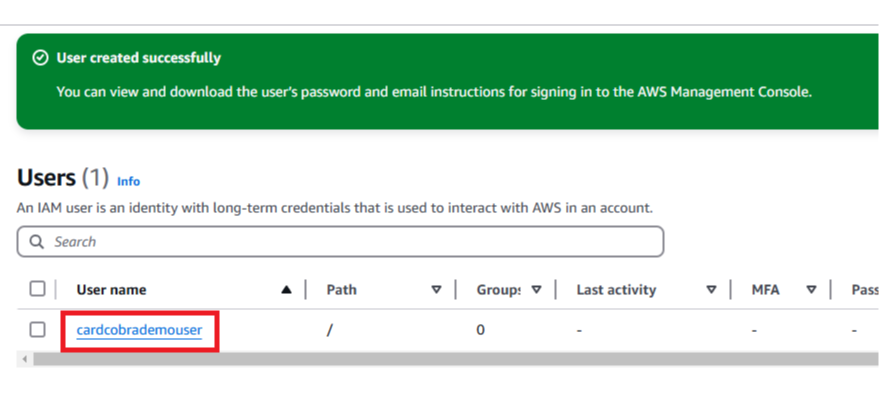
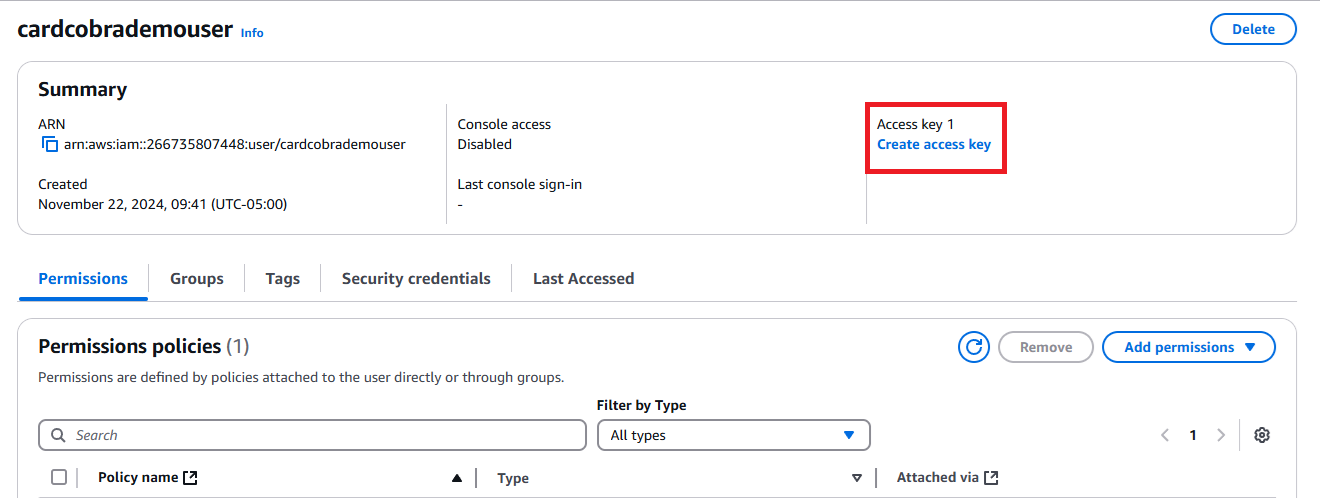
Now that the user has been created, click on the username to access more settings. Then click on "Create access key". Choose the "Local code" option and check the confirmation box, then click "Next". Enter "Cardcobra" for your "Description tag value" and click "Create access key". This will then show you your access keys that we will put into your CardCobra settings.


You will see your keys now, which you can copy and paste into your CardCobra settings in the corresponding fields. Click "Done" after that. Then we're finished with AWS setup--nice work!


